

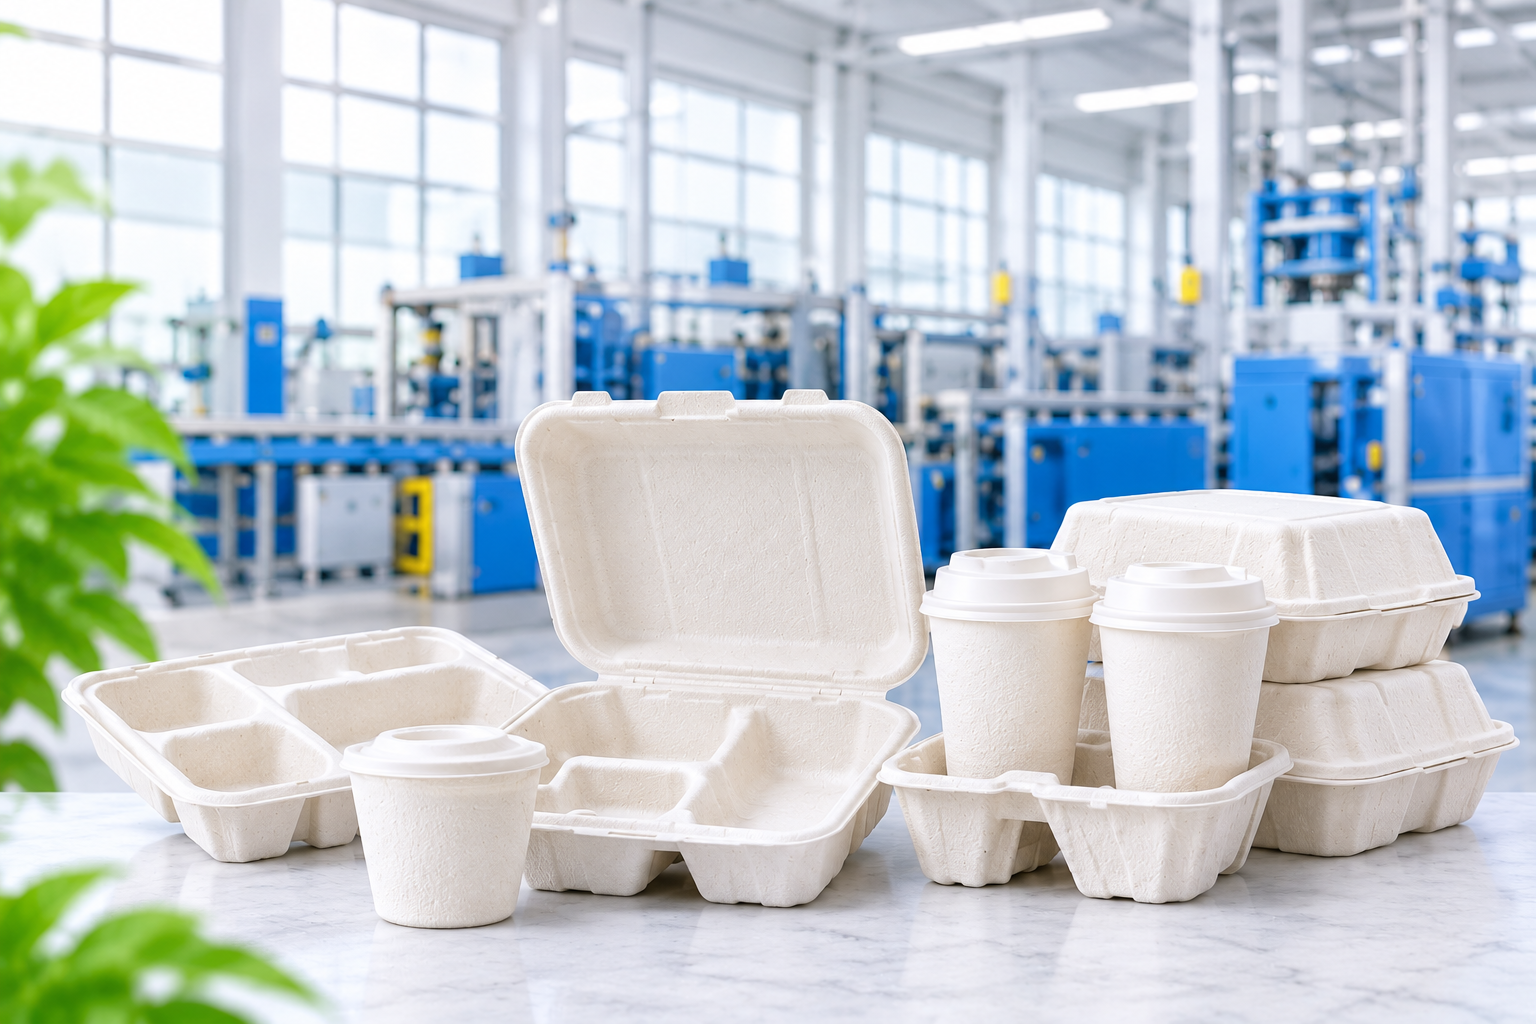
A moulded pulp part will be manufactured in the following steps; product design, tooling, pulp preparation, forming, hot pressing, trimming & finishing, and inspection. A wet press moulded pulp part will be created by forming using a vacuum, and then pressing using hot tooling. Product design and tooling are the key factors, and will be finalised prior to manufacture.
Key Takeaways
- Moulded pulp is created using natural fibre (bamboo, bagasse and recycled paper) which is combined into a slurry and formed using a mould.
- Product design comes first. You will want to ensure your product, accessories and outer box have the correct shape. Ensuring your part has draft angles and rounded edges will help with clean ejection and even forming.
- Tooling consists of 3 parts; forming mould, hot press mould and trimming die. These are typically produced using CNC machining using either aluminium or tooling steel. They will be tested using test parts before going into production.
- A wet press creates a part using wet forming. The part is pressed using hot tooling, creating a part with thinner walls, finer details and smooth surface.
- A small number of variables will affect the quality of your part. These include slurry consistency, vacuum time, hot pressing temperature, pressure and time, and sharp trimming dies.
- You will need to finalise details such as cavity layout and embossed logo, as changes would require tooling changes or rework.
- Ideally your lead time will be 3 to 6 weeks. Tooling will be included in your first run of the part. If you reorder your part will be produced using your tooling again. There will be a minimum order quantity. This will be confirmed once we know what part you require.
- We will require you to send through your product, accessories, outer packaging and quantities. We will then confirm the fit using a physical prototype.
Whilst a moulded pulp insert may seem simple there are many engineering decisions to be made throughout the process. Most will be decided in the early stages.
This guide will help electronics, cosmetics, healthcare and other brands and product teams within Australia to understand how moulded pulp packaging will be manufactured. We will take you through the process of designing a part from start to finish, considering fibre material, design, tooling, forming, hot pressing, finishing, inspection. We have over four decades experience manufacturing packaging, including wet press moulded pulp, rigid boxes, corrugated boxes and cardboard boxes so each part can be designed with the rest of your packaging in mind.
01. What Is Moulded Pulp?
Moulded pulp is created by breaking down fibre into a slurry. The first thing to decide is what fibre will be used in your part. This will determine how strong and smooth your part will be. We create our moulded pulp using a mixture of bamboo, bagasse and old corrugated containers (OCC). We do not use virgin plastic.
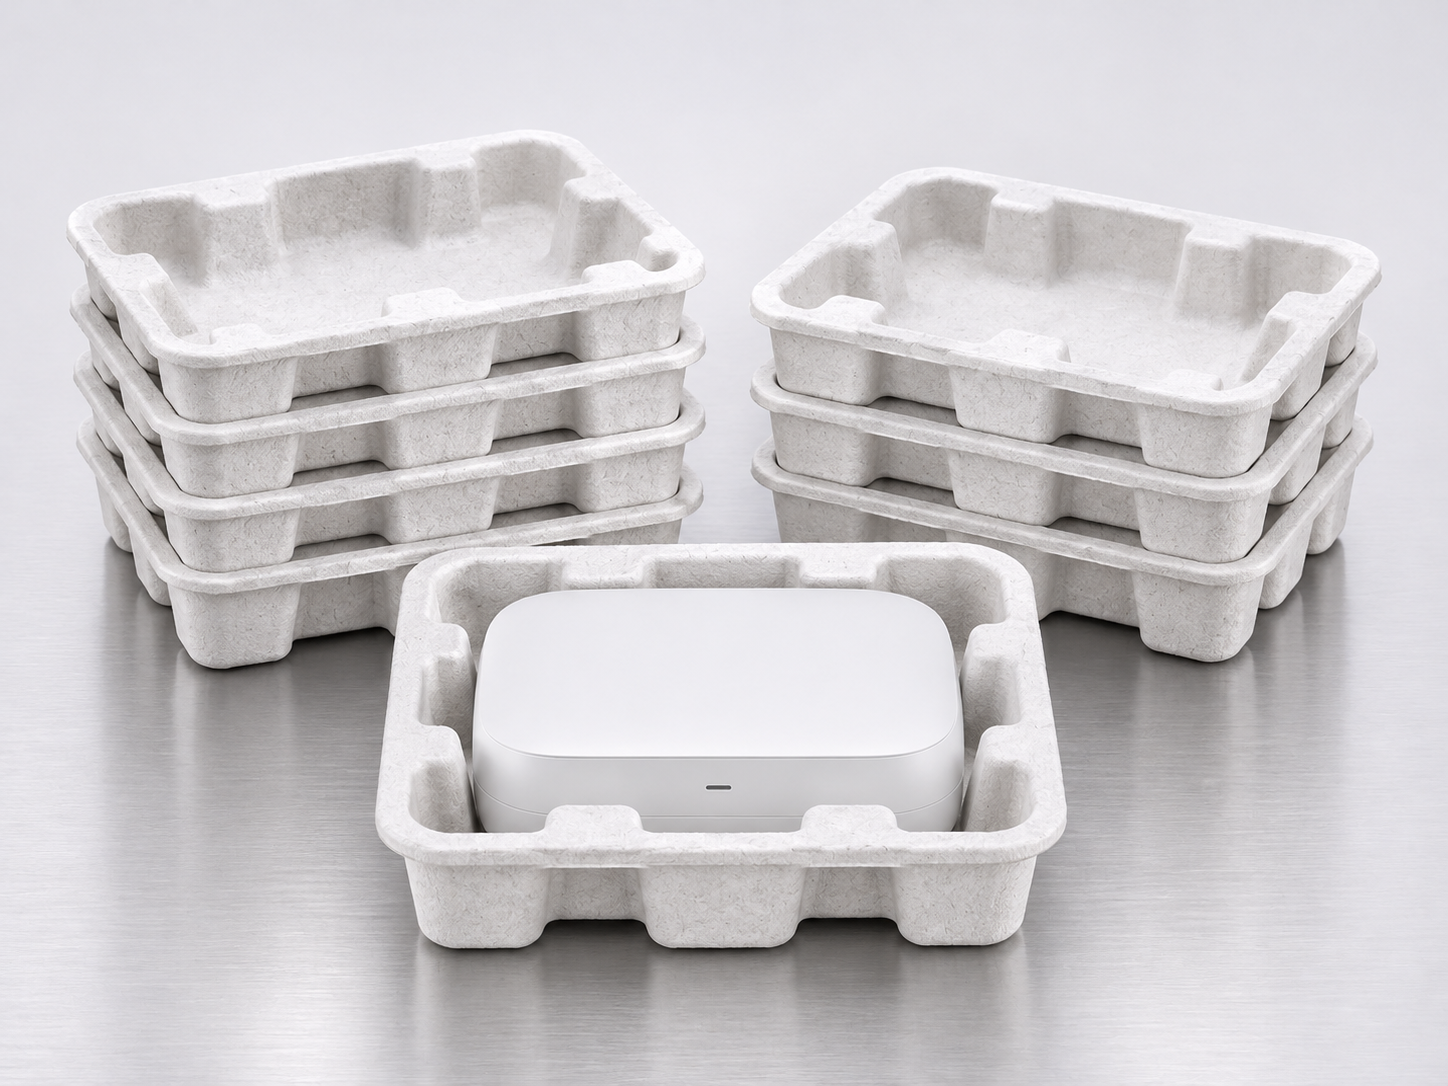
| Fibre | Source | Benefits |
|---|---|---|
| Bamboo | Fast growing plant | Strong and will resist moisture in the final product. |
| Bagasse | Fibrous waste from sugarcane juice extraction | Will help create a smooth surface. |
| Recycled paper & OCC | Recycled paper and old corrugated cardboard | Will form the base of the mixture to reuse existing fibre. |
The type of fibre used will depend on the part. If you are looking for a stronger part you will want to increase the strength of your part. If your tray is visible you will want to ensure you have a fine surface. Water and oil resistant additives can be added if your product is moist or oily. At the start of your project please let us know if your product is moist, oily or food related. This will impact what fibre we use in the mixture and how your part will be handled at end of life. To get an overview of the different types of moulded pulp please see our general overview of moulded pulp types.
02. What Are the Processes When Creating Your Product?
There are 8 processes involved in creating your moulded pulp part. Each step will pass on the outcome of the previous process.
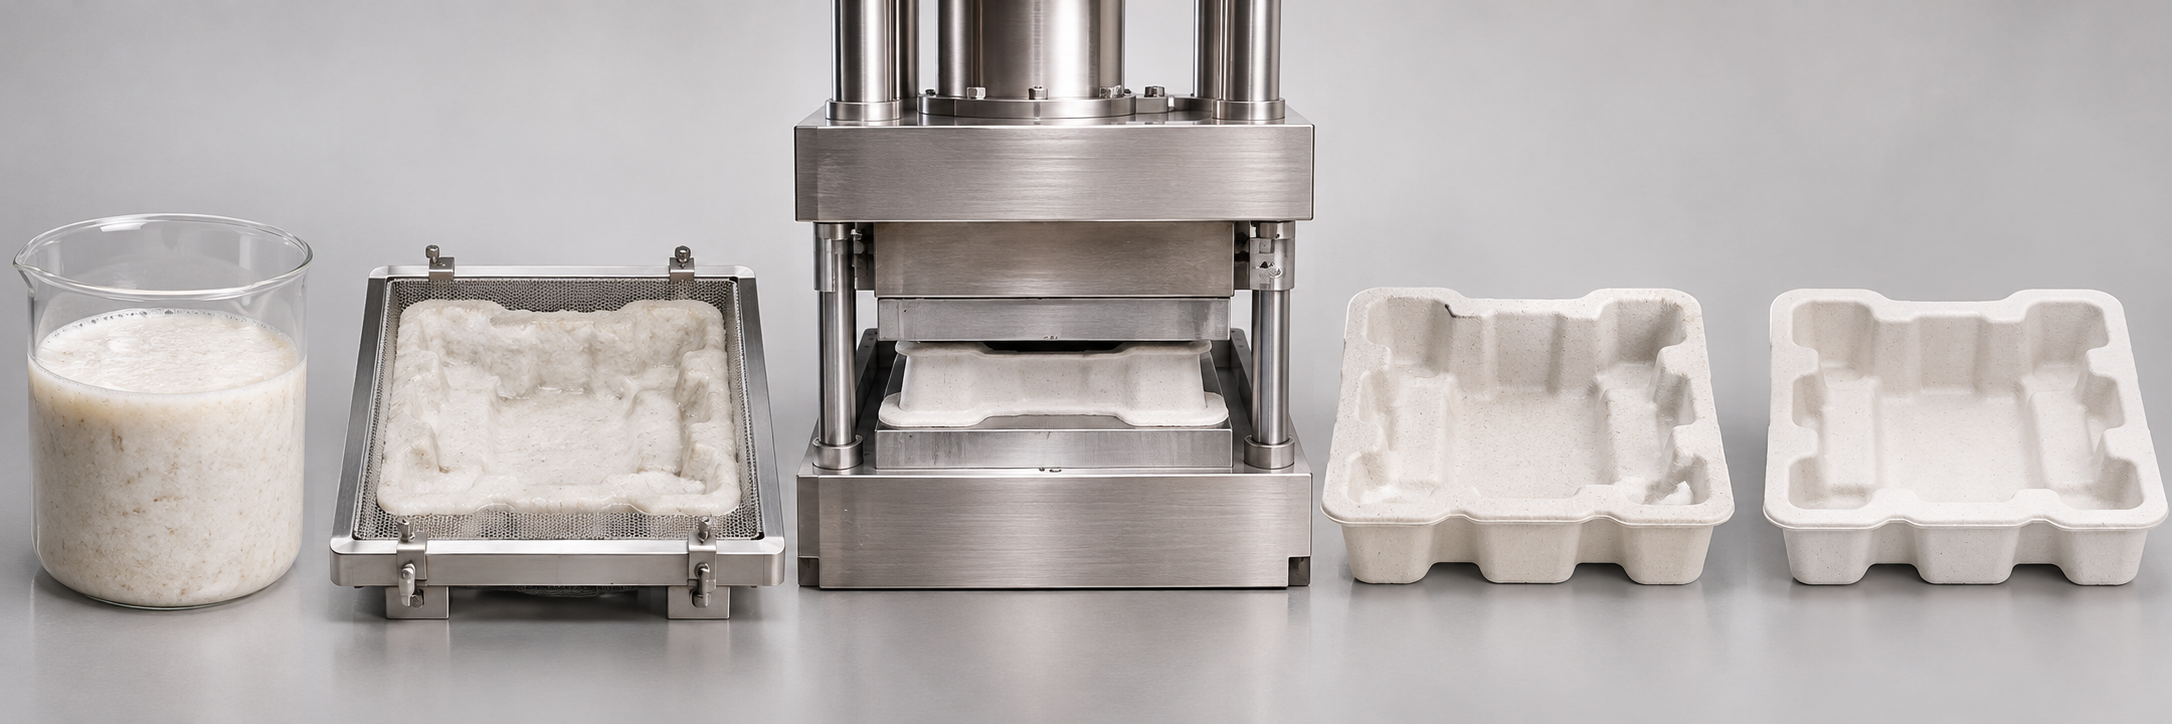
| Process | What happens | Outcome |
|---|---|---|
| 1. Product Analysis & Design | Analyse your product, accessories & outer box. Draw your part. | Part with draft, cavities and clearances. |
| 2. Tooling | Machining the 3 tooling parts together, aligning and trialling. | Confirmed tooling using test parts. |
| 3. Pulp Preparation | Fibre is ground down in water. Slurry is filtered and kept at a consistent thickness. | Consistent slurry. |
| 4. Forming | Mesh covered mould placed into the slurry. Vacuum pulls fibre. | Wet preform. |
| 5. Hot Press | Preform pressed and dried using hot tooling. | Dry rigid part. |
| 6. Trimming | Die trims part. | Accurate edge. |
| 7. Finishing & Cleaning | Loose fibre removed from the trimmed edges. Parts packed dry. | Clean part. |
| 8. Inspection | Parts inspected against approved product & prototype. | Parts ready to deliver. |
If an issue occurs in the early stages it cannot be resolved later in the process. For example if the part does not have thick walls in step 4 it cannot be fixed by pressing in step 5. If the cavity is too tight this will be an issue in step 1. This is why we pay the most attention to your design and tooling. The entire project will fall under our 7 stages; specification, product fit test, design, prototyping, approved, production & delivery. Please see our custom packaging manufacturing process page for more information.
03. How Do We Design Your Moulded Pulp Part?
Design comes first. We will need your product, any accessories and the outer box to ensure your part has the correct shape. A product fit test will be completed first. Rarely will the actual product's measurements match those listed. A wet part will need to be ejected from a mould so there are a few rules to follow when designing.
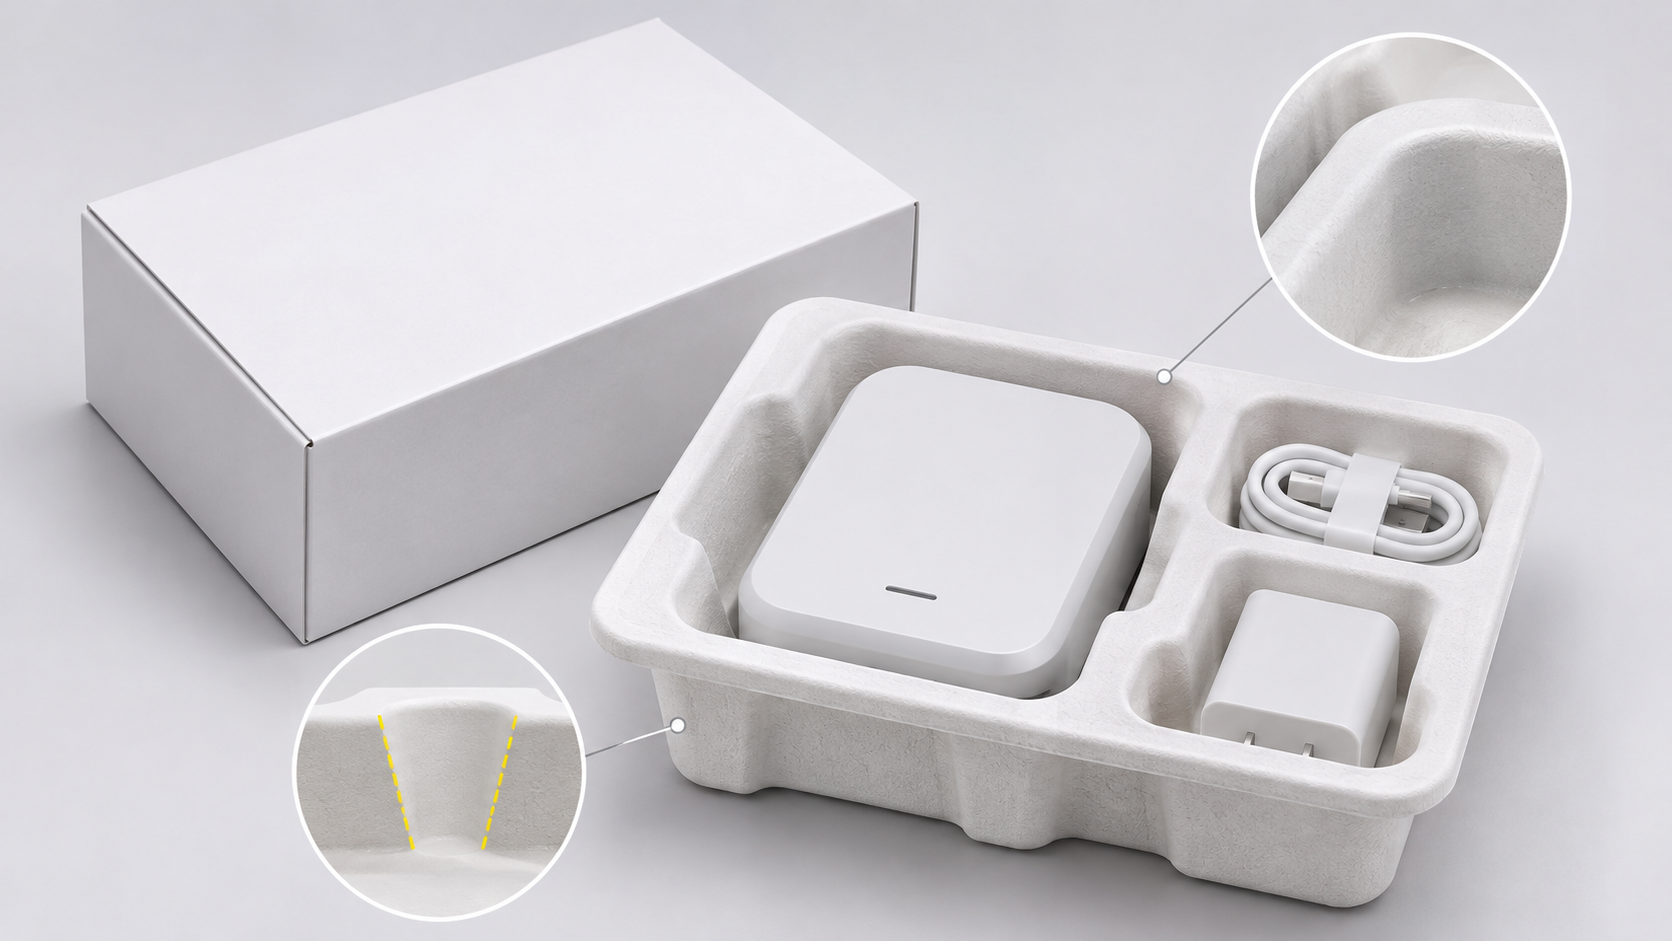
The design follows these rules. Draft angles let the part lift out of the mould without sticking or tearing, so the walls tilt slightly outward from the base. Every cavity corner is rounded, because fibre settles unevenly in sharp corners and leaves thin spots. There are no undercuts, since an undercut traps the part in the mould and every wall needs to release in one movement. Ribs and raised walls around the cavities stiffen the part without adding material. Cavity depth is kept in proportion to its opening, because a deep, narrow cavity forms unevenly. A small clearance is left around the product so that it seats without binding, and this is confirmed on the test fit.
Example: a tray for an earbud case
The following is a made up example to show the decisions. It is not a specification, and every part is confirmed on its own prototype. The tray has one cavity for the charging case, a narrow channel for the cable and a flat recess for the leaflet, so each item has its own fixed position and nothing moves in transit. The walls tilt slightly outward so the part releases from the mould and the wall thickness stays even. Every cavity corner is rounded to avoid thin spots where fibre struggles to settle. A raised lip around the outside stiffens the part and lets a rigid box lid close evenly. The logo is embossed on the visible face, and because it is built into the mould, it is decided before tooling. A small gap is left around the case, and this is confirmed on the test fit so that the case seats without binding or rattling.
The outer box is just as important as the product itself. The depth of the insert will determine how your rigid outer box closes and the overall footprint of the insert will dictate how well it fits into your corrugated box. We design the insert and outer box together and check all pieces for how well they fit together.
04. What Is Moulded Pulp Tooling?
Tooling refers to the tools used to create the part from slurry. There are three tools in wet press:
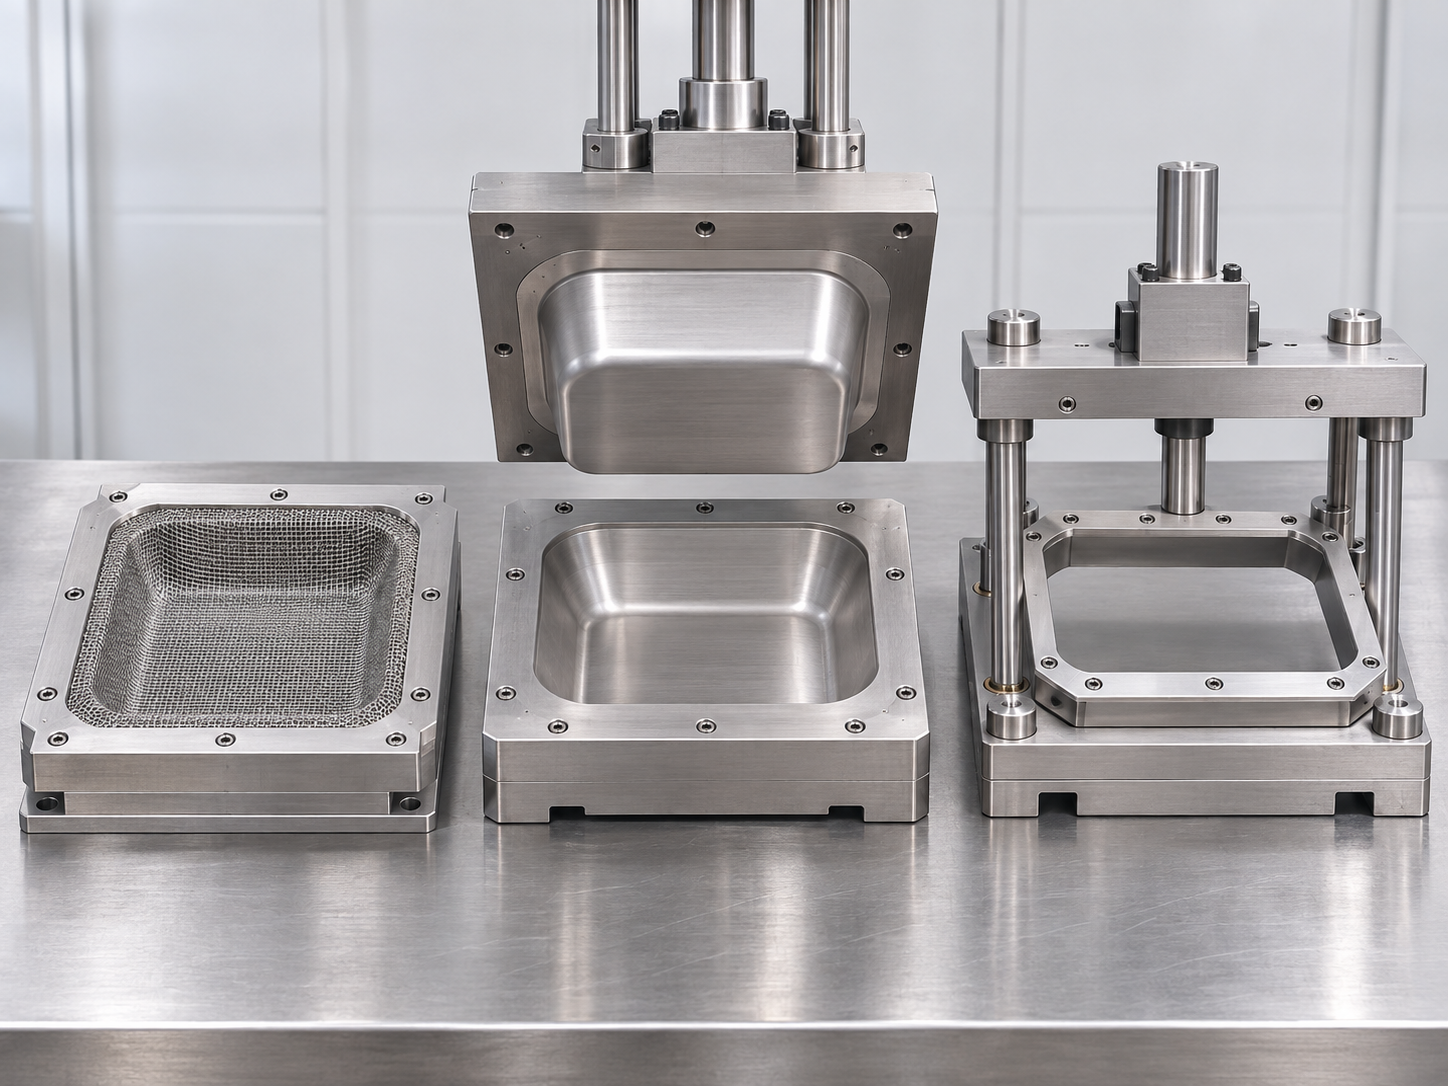
| Tool | Purpose | Notes |
|---|---|---|
| Forming mould | Mesh covered tool which uses vacuum to collect fibre. | The mesh design creates a wet blank with the correct shape. |
| Hot press mould | This has a convex and concave matching tool. This will compress and dry the part. | The hot smooth surface creates the desired surface. |
| Trimming die | This trims the compressed part. | The tool needs to be kept sharp for a clean edge. |
Tooling is usually machined using a CNC tool from a metal block to help give accuracy and allow complex designs. You can also cast the tooling however it usually isn't as accurate so is best for simple parts. Due to the slow wet press process the tooling often has multiple cavities to produce more parts per cycle. Two common materials used are Aluminium and Tool Steel.
| Material | Pros | Cons | Best for |
|---|---|---|---|
| Aluminium | Light weight and easy to heat and machine | Not as durable for long runs | Best for shorter runs and parts which could be subject to changes |
| Tool steel | Strong and durable | Heavier and takes longer to machine | Best for long runs and repeat orders |
How to create tooling
The tooling is the longest element of a first run so we make sure we have the design approved before any metal is cut.
05. What Is the Difference Between Wet Pressed and Dry Pressed Moulded Pulp?
Both processes begin the same way using slurry. However, dry pressed parts are dried first and then compressed whereas wet pressed parts are compressed in a hot tooling. This can be seen in the finished part.
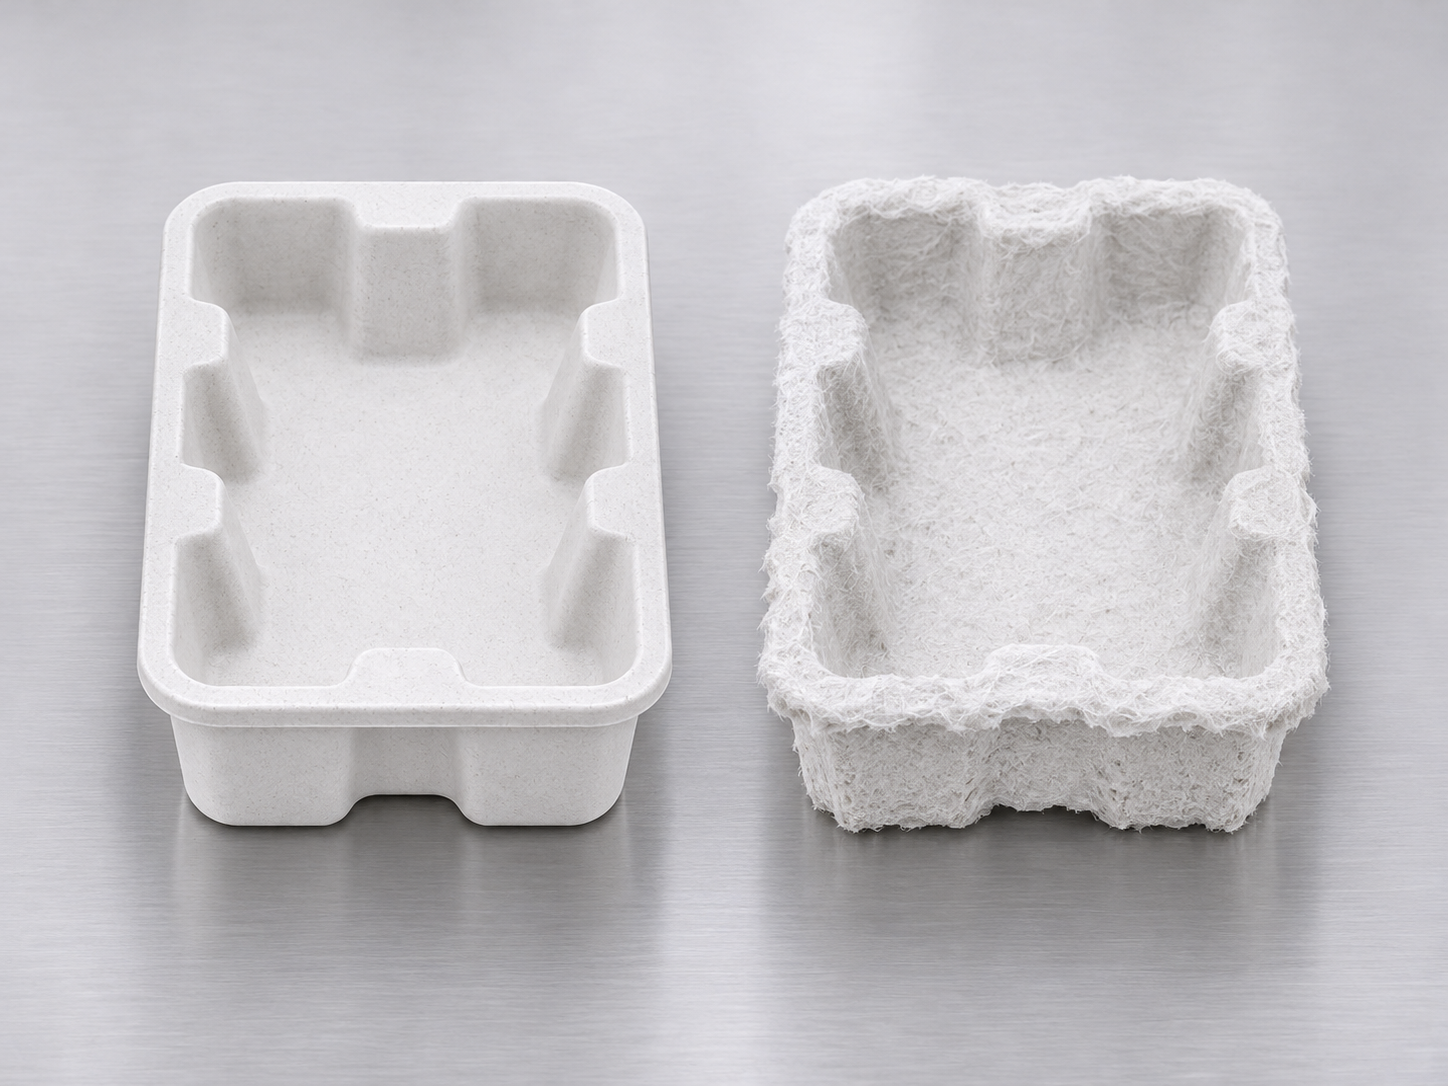
| Feature | Wet Press | Dry Press |
|---|---|---|
| Process | Compressed and dried in hot tooling after being formed in wet. | Dried and then compressed. |
| Finish | Smooth finish from hot and smooth tooling. | Egg shell like finish on the reverse. |
| Wall thickness | Approx 1mm | Approx 1.5 to 3mm |
| Detail | Sharp edges and fine detail | Softer detail |
| Usually used for | Electronics, cosmetics and presentation packaging | Appliances and transit packaging. |
These wall thickness figures are a general industry standard and not specific to us. We will confirm what wall you will require at design stage. Wet pressed parts have a smoother finish which mimics the tray found in premium electronic boxes. The thinner walls will allow space for your product in tight packaging.
06. How Is the Pulp Processed?
The pulp is formed from slurry. The fibre is ground down and mixed with water. It is then filtered to remove any debris and large fibre clusters as this can cause a lump on the surface of your part. The slurry is kept moving to stop fibre settling. The slurry consistency is also controlled as this will affect how much fibre goes into the tooling.
The forming process involves:
The wall thickness can be altered by adjusting the vacuum time and fibre concentration of the slurry. The longer the vacuum time the thicker the wall will be. Thinner slurry will create thinner walls. These settings are adjusted on the trial parts.
07. How Are the Parts Finished?
The hot pressing process is when your part takes its final form. The wet blank is placed between the two halves of the hot tooling. This will shape, compress the fibre to increase stiffness and dry your part. This whole process takes around 2 minutes per part. The temperature, pressure and time are set for each part to create a dry and stiff part.
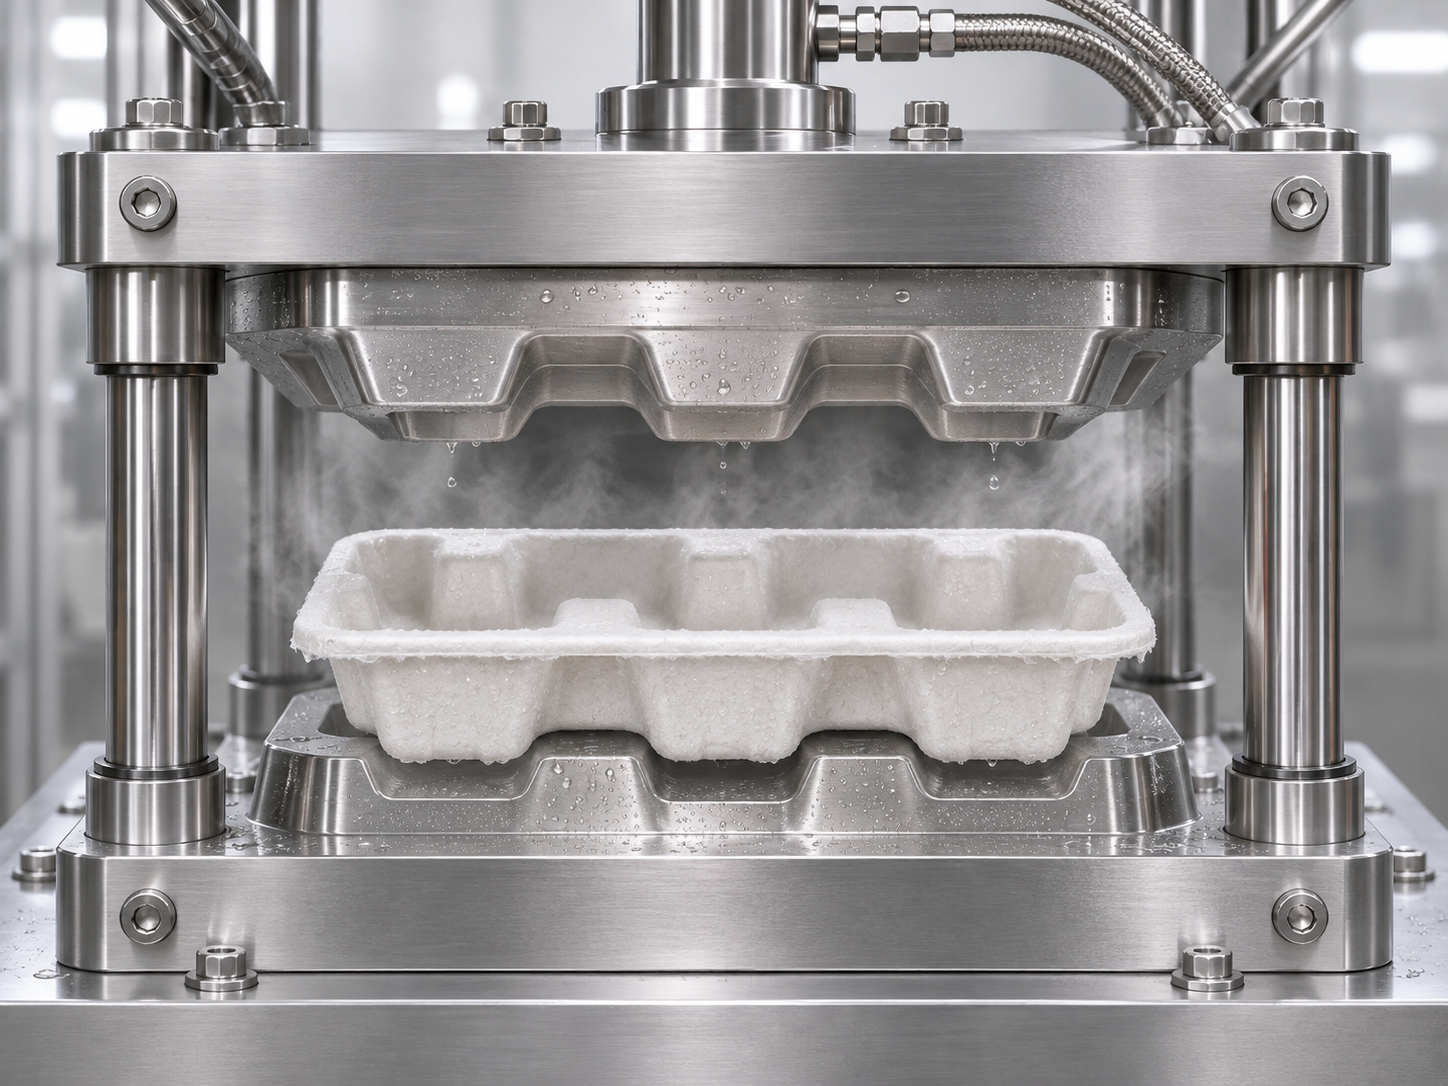
| Process | Purpose | Effects |
|---|---|---|
| Hot pressing | Compresses and dries the part. | Shape, stiffness, finish and dryness. |
| Trimming | Removes extra fibre and shapes the edge. | Clean edges and accurate sizing. |
| Embossing or debossing | Included in tooling. | Logo and finishing detail. |
| Cleaning | Removes loose fibre from the edges. | Clean edges. |
| Packing | Packaged dry. | Size and stiffness in storage and transit. |
The finish is created by the tooling so will be consistent throughout the run. Pulp absorbs humidity in the air so humidity in storage can cause issues. We package parts dry and this will help to keep them dry on your end.
08. What Controls Affect the Quality of the Finished Part?
Most of the quality of your moulded pulp part will be controlled by a small number of controls. All of these will be set on the trial parts.
| Control | Effects | How controlled? |
|---|---|---|
| Slurry consistency | Wall thickness and evenness. | Consistent and kept moving. |
| Fibre filtering | Surface imperfections and debris. | Filtered before forming. |
| Vacuum time | Amount of fibre and wall thickness. | Set per part. |
| Temperature | Dryness and finish. | Set per part. |
| Pressure | Density and stiffness. | Set per part. |
| Time | Dryness and rate. | Set per part. |
| Sharpness of die | Clean edges. | Checked and kept sharp. |
| Humidity in storage | Softening and warping. | Packaged dry. |
All of these controls work together. If you have a thicker wall you will need a longer pressing time to fully dry. If you have a deep cavity you will need to increase the vacuum time to create an even wall. This is why trial runs are performed on the tooling to find the correct settings for your part.
09. How Do We Test the Quality of the Moulded Pulp?
We test the parts to ensure they match the approved product.
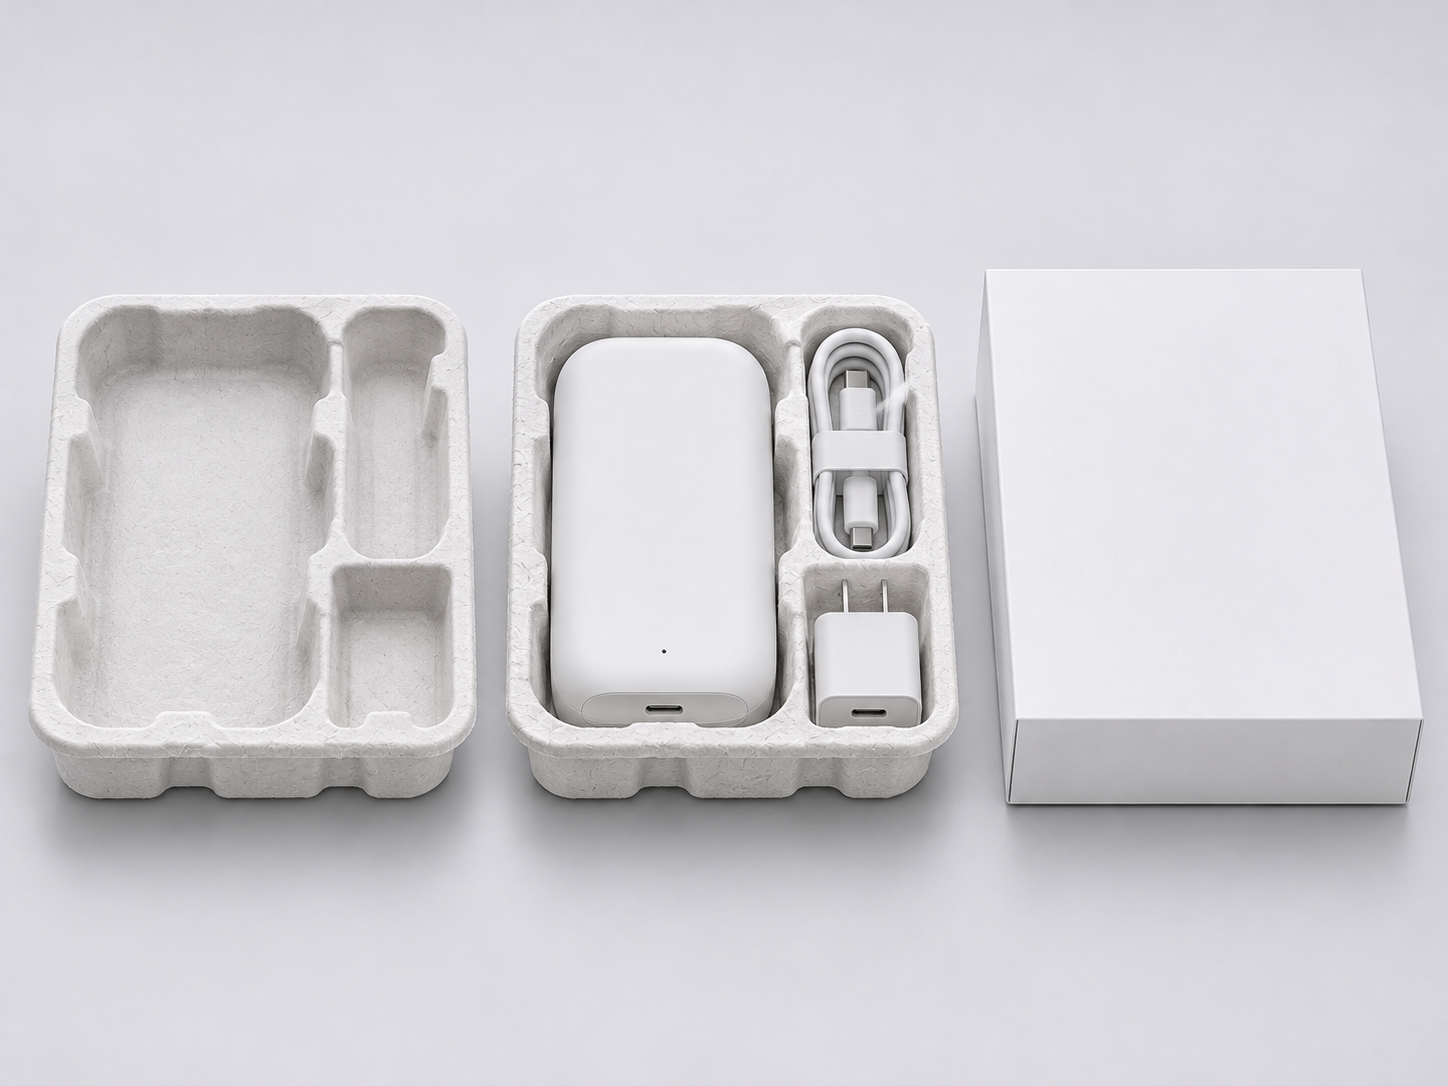
| Test | Checked |
|---|---|
| Fits in real product | Fits securely in cavity. |
| Even walls | Even walls with no thin areas. |
| Clean edges and surface | Clean edges and no surface imperfections. |
| Correct size | Key measurements match the approved sample. |
| Dry | Fully dry and stiff. |
| Consistent throughout run | Last part matches first. |
| Heavy or fragile products | Secure heavy or fragile products. |
Common issues and how we prevent them
| What you see | Likely cause | How it is prevented |
|---|---|---|
| Warping | Uneven drying or pressing | Even pressing and drying, and tooling kept in good condition |
| Thin spots | Sharp inside corners or an unsteady slurry | Rounded corners and a steady slurry |
| Ragged edges | A blunt trimming die | Sharp dies, inspected between runs |
| Poor fit | The product differs from its data sheet | Test fit and a physical prototype before production |
| Surface marks | Debris in the pulp or a worn mould | Screened pulp and inspected moulds |
| Softening | Moisture after packing | Dry packing and dry storage |
Most of these are prevented at design or tooling, not found at the end, which is why the prototype comes before production and nothing starts until you approve it.
10. What Can You Customise, and What Is Fixed Once the Tooling Exists?
Moulded pulp can be tailored closely to a product, but the tooling is a fixed set of metal tools. Some choices can be adjusted late, and others cannot.
| Feature | Decide it | After the tooling is made |
|---|---|---|
| Cavity layout and number of cavities | At design, before tooling | A change means altering or remaking the tooling |
| Wall angles, ribs and depth | At design, before tooling | A change means altering or remaking the tooling |
| Outer size and rim | At design, before tooling | A change means altering or remaking the tooling |
| Embossed or debossed logo | At design, because it is built into the mould | A change means altering the tooling |
| Fibre blend and additives | At specification | Can be reviewed, and is confirmed on a prototype |
| Colour | At specification | Can be discussed at the start |
| Quantity | At each order | Set for each order, with the same tooling reused for repeats |
The easiest moment to change a part is on paper, and the next easiest is on the prototype. If you think the structure may change, tell us before the tooling is cut so that we can plan for it, or ask for a lighter or smaller version to be prototyped first.
11. How Does a Moulded Pulp Insert Fit With the Rest of Your Pack?
A moulded pulp insert is not a standalone box. It holds the product in place and absorbs shock, and it needs an outer pack around it. We make the rigid boxes, cardboard boxes, corrugated boxes and pulp mold inserts, so every piece can be planned and checked together.
| Pack element | Its job | What we check |
|---|---|---|
| Moulded pulp insert | Holds the product in position and absorbs shock | Cavity fit and rim height |
| Rigid box | Presentation, and a firm structure around the insert | The lid closes evenly over the insert |
| Corrugated carton | Carries packs through storage and transit | Insert and box fit the carton and the pallet |
| Cardboard box | Printed outer pack from art card | The insert fits the box without being forced |
Moulded pulp parts are stackable, which keeps storage compact and is useful when parts arrive in volume. They are used for electronic devices packaging, where a tray is shaped to the exact component, and for cosmetics, food and beverage, home and personal care, and pharmaceutical packaging, where each item needs its own position. For how the outer pack is made, see our guide to how rigid boxes are made, and for the wider choice of materials, see our guide to sustainable packaging in Australia.
12. How Long Does the Moulded Pulp Process Take?
Our lead time is ideally 3 to 6 weeks, depending on the project. Several things move it within that range.
| What affects it | Effect on lead time |
|---|---|
| First run or repeat order | A first run includes the tooling, and a repeat order reuses it, so it can move faster |
| How quickly the specification is confirmed | The sooner the product, accessories and outer pack are settled, the sooner design can begin |
| Part complexity | More cavities, deeper walls and finer detail take longer to machine and trial |
| Prototype approval | One clean approval is faster than several rounds of changes |
| Quantity | A minimum order quantity applies, and we confirm it once we know the part |
Having the product and outer pack ready at the start protects the timeline more than anything else. A late change to the product after the design is drawn sends the project back to stage 1.
13. What Should You Send Us to Start a Moulded Pulp Project?
The more complete the brief, the fewer rounds the design needs. This is what we ask for.
- The product: a sample, or drawings with dimensions, so that we can run the test fit on the real item.
- Accessories and inserts: cables, leaflets, tools or other items that go in with the product.
- The outer pack: the box the insert will sit in, or its dimensions, so the depth and footprint can be matched.
- Weight and fragility: how heavy the product is and which parts of it are delicate.
- Surface and finish: whether you want an embossed or debossed logo, and where it should sit.
- Quantities: the pieces needed for each design, and whether repeat orders are likely.
- Delivery: the address in Australia and the date you need the parts in hand.
- One approver: a person who can sign off the prototype quickly.
If any of this is not yet decided, tell us what is open. We would rather agree a plan for it at the specification stage than find it at the prototype.
14. Why Choose PT Print for Moulded Pulp Packaging?
Moulded pulp works best when the insert, the box and the carton are planned as one pack. This is what we bring to a project.
- Over 40 years of experience: we have produced packaging for over four decades, so the choices that shape a part are ones we have made many times.
- Wet press moulded pulp: a smooth, finished surface with sharp detail, shaped to your product.
- One manufacturer for the entire pack: rigid box, moulded pulp insert, corrugated box and cardboard box, with the fit of every item checked side by side.
- A physical prototype and your approval: nothing goes into production until you have approved a tested prototype.
- Certified management systems: we hold ISO 9001:2015 and ISO 14001:2015.
15. Conclusion
The moulded pulp manufacturing process is a chain, and its quality is set early. Design fixes the shape, tooling fixes the detail, and a few controls in forming and pressing fix the consistency, so the decisions that matter most are made before production starts. Bring us the product, its accessories and the outer pack, and we will design the insert around them, prove it on a physical prototype, and confirm the fit before you approve anything.
Need moulded pulp made for your product?
Tell us about the product and the pack it goes in, and we will confirm the design, tooling and timeline for your moulded pulp part.
Talk to Us About Moulded PulpFAQs
What is the moulded pulp manufacturing process?
It runs in order: product design, tooling, pulp preparation, forming, hot pressing, trimming and finishing, and quality checks. A vacuum draws fibre from a slurry onto a mesh covered mould, and the wet preform is then pressed and dried in heated tooling to its final shape.
What is moulded pulp tooling?
Tooling is the set of three metal tools used to make the part: a forming mould that collects fibre under vacuum, a hot press mould that presses and dries it, and a trimming die that cuts the outline. It is normally CNC machined from aluminium or tool steel and proven on test parts before production.
What is the difference between wet press and dry press moulded pulp?
In wet press the part is formed wet and pressed and dried in heated tooling in one step, giving a smooth surface, thinner walls and sharper detail. In dry press the part is dried first and then pressed, which gives a rougher surface and thicker walls. We make wet press moulded pulp.
What fibres do you use for moulded pulp?
Our moulded pulp uses a blend of bamboo, bagasse and old corrugated containers (OCC). Bamboo adds strength, bagasse helps a smoother surface, and recycled paper fibre forms the base of the blend.
How long does the moulded pulp process take?
Our lead time is ideally 3 to 6 weeks, depending on the project. A first run includes the tooling, and a repeat order reuses it, so it can move faster. A minimum order quantity applies, and we confirm it once we know the part.
Can a moulded pulp part be changed after the tooling is made?
Small surface details may be adjusted, but changes to the cavity layout, wall angles, size or an embossed logo mean altering or remaking the tooling. It is better to settle these at the design stage and prove them on a prototype.
Do I get a prototype before production?
Yes. Every project goes through a physical prototype and your approval before production starts, so that fit and finish are checked on a real sample and not only on a drawing.
Is moulded pulp packaging recyclable?
Moulded pulp is made from plant and recycled paper fibre, and an uncoated part can go into paper recycling where your local collection accepts it. Additives for water or oil resistance can change this, so tell us if end of life matters for your product.
Which products is moulded pulp suited to?
It suits products that need to be held in a fixed position and protected from shock, such as electronics, cosmetics, food and beverage items, home and personal care products, and pharmaceutical and healthcare items. Each tray is shaped to the exact product.